What we wish we knew: lessons for rain garden implementation
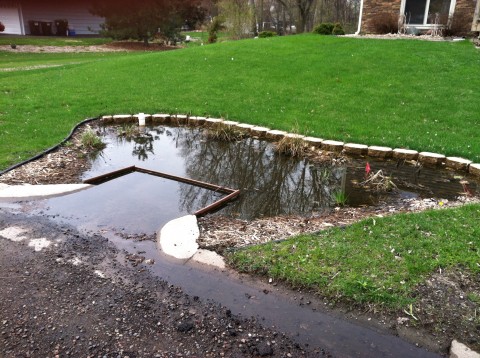
Over the last decade the Anoka Conservation District (ACD) has been involved in the design and construction of over 100 rain gardens in Anoka County. While the overwhelming majority fall closer to the 'ideal' end of the spectrum, we've been party to a few on the 'nasty' end as well. Properly functioning rain gardens often go unnoticed because they blend in with other landscape amenities. In contrast, the small fraction of 'nasty' rain gardens get the public's attention with nasty smells and mosquito problems. Rest assured, we've learned from our mistakes, refined our process, corrected the problematic rain gardens, and can confidently say we're now able to avoid the 'nasties'.
The lessons learned over the years have improved every aspect of rain garden location, design, installation, maintenance, and follow-up. These are our suggestions for other organizations designing and installing rain gardens.
Design
- For a standard rain garden, the water table should be at least five feet below the bottom of the garden. This will require an eight-foot-deep soil boring during the design process because the bottom of the garden is often two to three feet below the original ground elevation. Rain gardens with shallower water tables are feasible, but require an underdrain to function properly.
- Soils should have high infiltration rates, generally one to three inches per hour. Rain gardens can be built in soils with lower infiltration rates, but may require an underdrain or a ponding depth shallower than 12".
- If an underdrain is needed, install a control mechanism that allows variable draw down rates and levels. This provides a mechanism to capitalize on natural infiltration that may increase as the deep root structure of the native plant community matures and creates pathways for infiltration.
- Water must be able to get into the garden consistently, predictably, and without causing erosion. The curb-cut should be sized to safely pass sufficient water volumes.
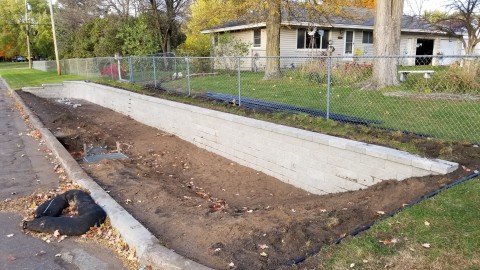
- Utilizing a retaining wall along the back of the garden can improve the aesthetic appeal and allow the garden to store more water. Rain garden side slopes should be no steeper than 3:1. Therefore, for every foot of wall height, three feet of rain garden bottom is gained. In many cases this simple addition more than doubles the size of the garden.
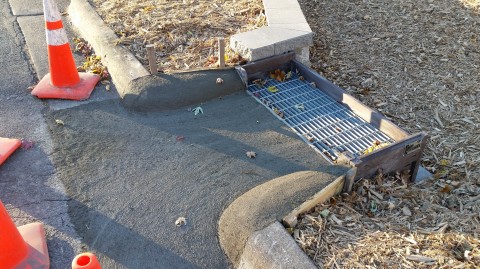
- Consider using a pretreatment chamber. A pretreatment chamber functions like a filter, capturing floatables like leaves, trash, seeds, and sediment to ensure rain gardens are able to properly receive water and dry between storms
- Rain gardens should be sited where they will capture runoff from a sizeable contributing drainage area that would otherwise make it into a priority water resource.
- They should treat stormwater that isn't already routed to a stormwater pond or other installation for stormwater management.
- They should be strategically located on properties where they will quickly fill during storms and quickly drain between storms.
- They need to be located where they won't interfere with utility lines. Utility companies have minimum cover requirements over lines that may not be met following rain garden excavation. While some utilities like cable lines can be moved or lowered for a relatively low expense, others like gas and electrical lines can be cost-prohibitive to relocate when they conflict with the proposed rain garden location.
- If a rain garden is installed in an area where the road routinely floods over the curbs, water will flow into the rain garden over the sides and cause erosion. It will also result in deeper water than intended, which will take longer to drain out.
- If a rain garden receives water from a large neighborhood with non-natural runoff sources like irrigation systems or sump pump discharge, the rain garden may never have the chance to drain completely.
Installation
- Curb-cut rain gardens are one of the few conservation practices where landowners volunteer to use their property to treat runoff from other properties. The landowner volunteering contributes relatively little to the problem and benefits relatively little from the solution. They also commonly assume maintenance responsibility for 10 years. For these reasons, local government should consider covering 100% of the construction costs.
- Avoid equipment traffic within the garden.
- Check soil infiltration rates. If they are under the design specification, loosen soil throughout the
- garden with a four-foot auger.
- Plant gardens in the spring and early summer, not in the fall.
- Lay no more than three inches of mulch.
- If possible, consider leaving the curb intact until the plants are established and then complete the curb-cut. Minimally, when installing a curb-cut rain garden as a retrofit, leave the curb intact until the basin is completed. This ensures the basin is stable and ready to receive runoff as soon as the curb-cut and apron are installed.
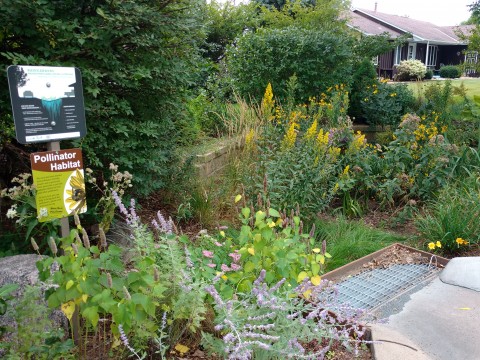
- Install informative temporary signage during construction and permanent signage upon project completion that explains the value and function of the rain garden.
Maintenance
This is a list of suggestions that can be provided to a homeowner after installation:
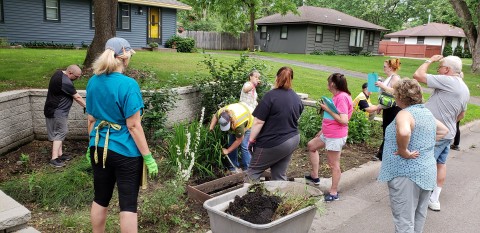
- Get your neighborhood involved! If your neighborhood has several rain gardens, try to schedule a periodic neighborhood cleanup day.
- Mulch will break down and should be refreshed every couple years.
- Stay on top of weeding. Err on the side of pulling too much.
- Homeowners should not be afraid to experiment with the plants in their rain garden. Try using native plants to encourage pollinator presence!
- Pretreatment chambers should be cleaned out after each rain event. This should take no more than a few minutes.
- Remove excess leaves in the fall. Having a few leaves is great for catching sediment and creating critter habitat, but too many leaves will create mats and slow down water infiltration.
- Regularly remove sediment that makes it past the pretreatment chamber.
Follow-Up
- The sponsoring local government should connect annually with homeowners to remind them of maintenance needs, expectations, and flexibility.
- Make sure homeowners know who to call if they experience problems.
- Consider providing a maintenance program to help with plant replenishment or other incentive to keep gardens well maintained.
- After the 10-year life of the garden, consider a refresh. Hire
professionals to remove all plants, mulch, and accumulated sediment and
debris, and power wash the retaining wall and pretreatment chamber.
Then, add new mulch and replant, salvaging mature plants whenever
possible. This relatively inexpensive investment can buy another 10
years of function.
When done right, rain gardens are an effective and beautiful method for combating pollution in lakes and streams, replenishing groundwater, and creating pollinator habitat. However, not every property or every homeowner is ideally suited to have a rain garden. While professionals at ACD can assess whether or not a property is a viable candidate, only the homeowner can decide if they are up to the task of maintaining a rain garden.
When you subscribe to the blog, we will send you an e-mail when there are new updates on the site so you wouldn't miss them.
